You will need to run Internet Information Services (IIS) Manager (IISM). You can start this from control panel under Administration tools, or by open in run (Windows KEY + R, or right click on the start menu and click on run, and then enter: %windir%\system32\inetsrv\InetMgr.exe). It might save you some time later if you drag a short cut of Internet Information Services (IIS) Manager onto the desktop, so you can get back to it easily in the future.
This step needs to be repeated for each site you wish to run. The choices are: SLS, B3, B3_ed,Red,Blue,Gold, Retail, Green, Qsoar, Qsoar_B3, Quoxient.
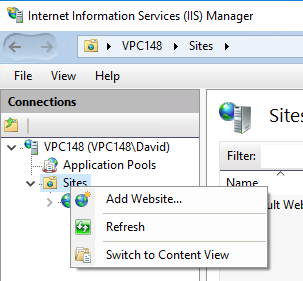
Expand the left panel in Internet Information Services Manager (IISM). Right click on sites and click on 'Add Website...'
Select the site that you want to configure by browsing the 'Physical Path' , expanding Local Disk C, InetPub, wwroot, until you find the site you want. (In this example 'Gold').
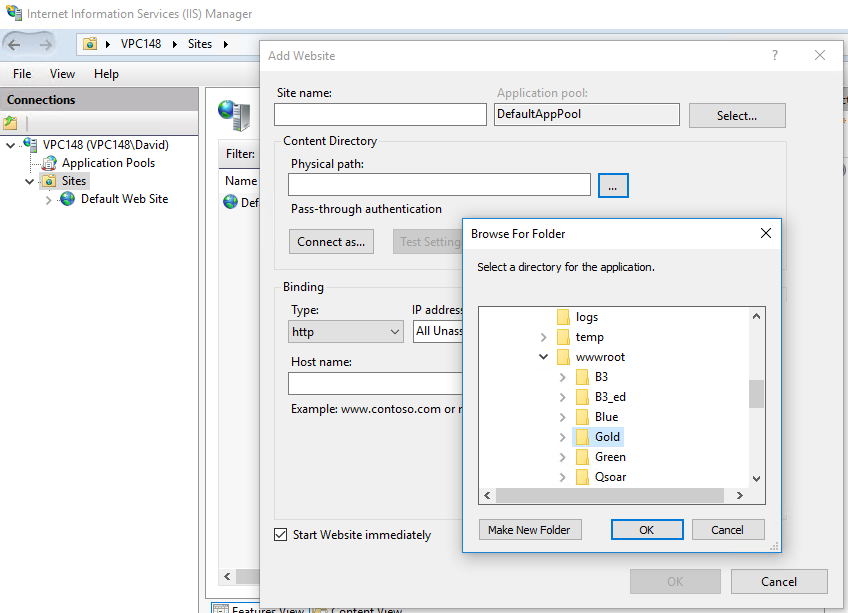
Add the site name (in this case 'Gold') and change the IP address to a unique port starting with 8080, so the first site should be 8080, the second 8081 and so on. In this case we will use 8085.
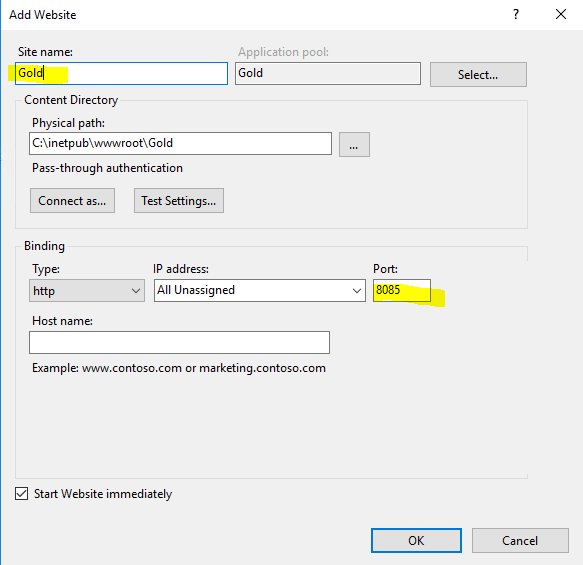
Note that the application pool changed when you added the site name. And now press OK.
Now in the left panel of IISM select 'Applications pools'. Select the site you just added (in our example 'Gold') and click on Basic Setting in the right panel of IISM:
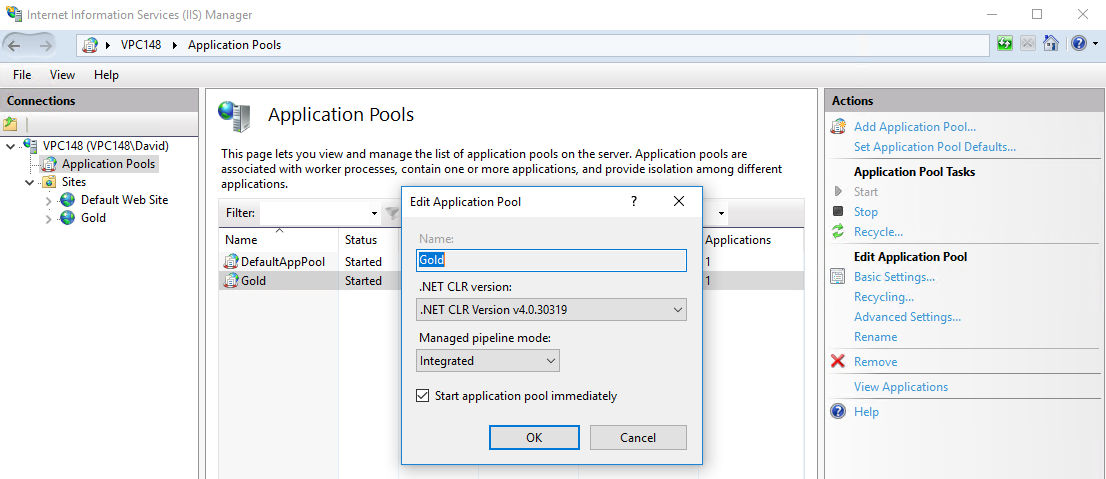
Name sure that .NET CLR version is selected as v4.x.xxxxx (and not 2.x.xxxx).
Now click on Advanced Settings, and scroll down to you find 'Identity'. This needs to be changed to Network Service. Open the Dialog (...) and select the 'Network Service' from the 'Built in Accounts'.
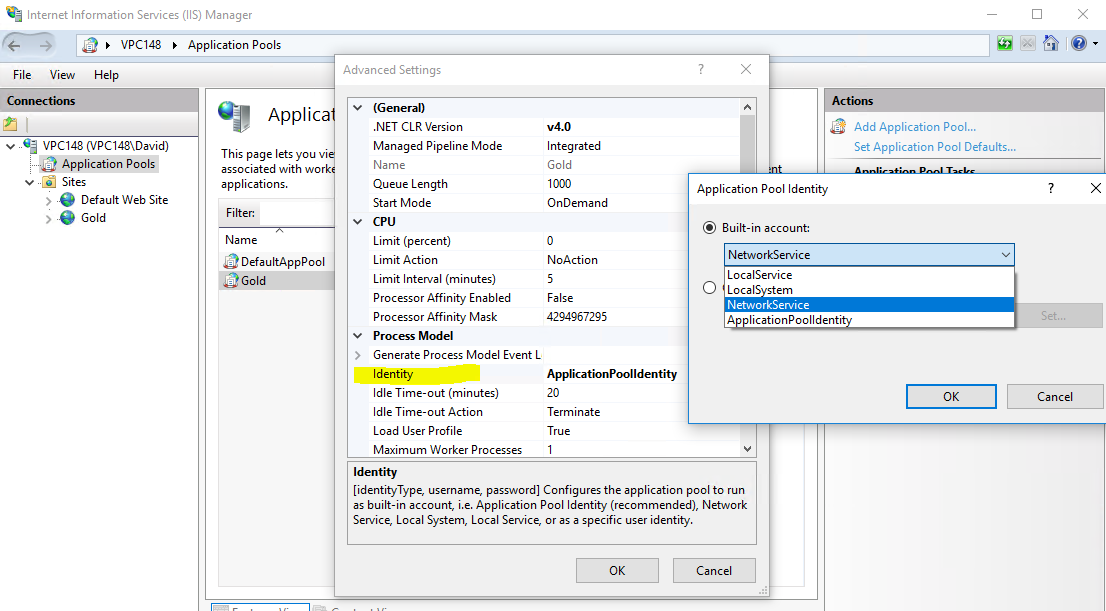
Advanced settings should now look like this:
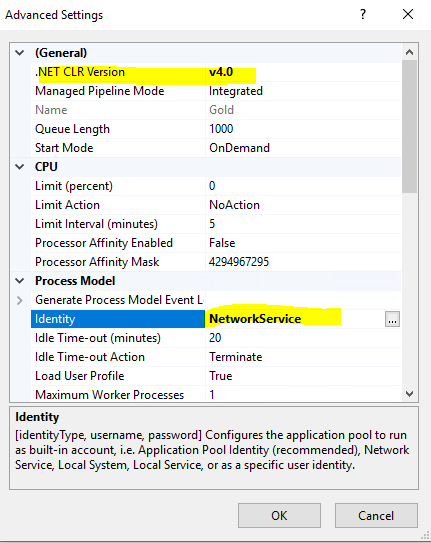
You may want to increase the idle time out to 720.
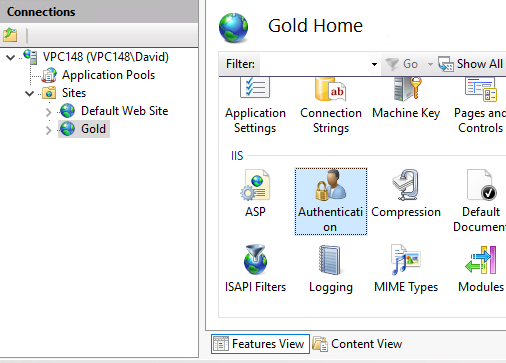
From the left panel of IISM select our web site (in our example 'Gold') and select in the middle panel 'Authentication'.
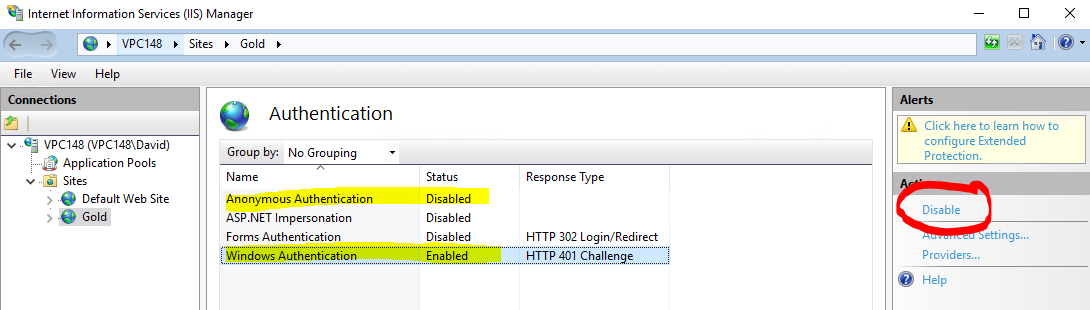
Change the setting to : Disable Anonymous Authentication, and Enable Windows Authentication, which we need to identify the user. Use the right hand side panel under actions to enable and disable.
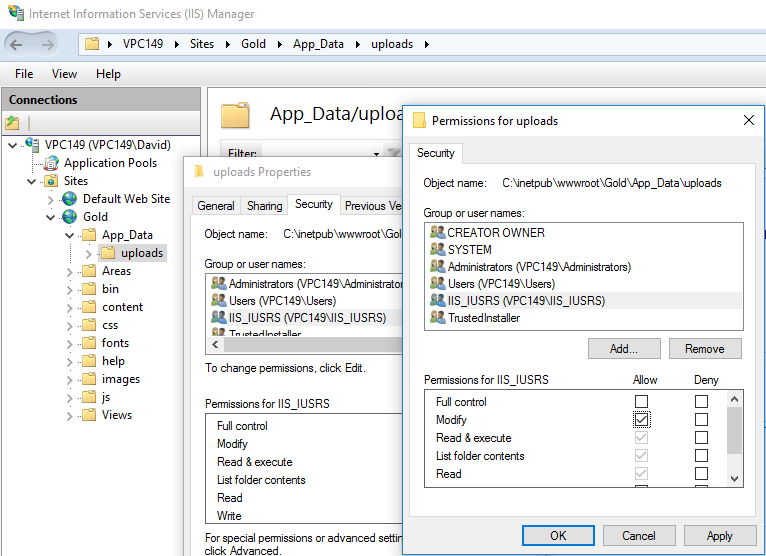
Expand the folder view of the Site, and right click on the 'uploads' folder.
Select properties, and then the 'Security' tab. Clicked the edit button, and give the IIS_IUSRS account modify permission (This is where we upload the excel spreadsheets for import, and generate the temporary ones for export by the 'Microsoft.ACE.OLEDB.12.0' provider for Excel import/export).
At this stage the website should be good to run.
Make sure that the web address is in the Local Intranet sites site for ie11 and Chrome, and for fire fox see how to fix the authentication required in FireFox even though you are on a local network.
Open your browser and use this web address: http://localhost:8085 (or use 80xx to match the Port that you specified above).
Repeat these steps for the other demonstration sites.